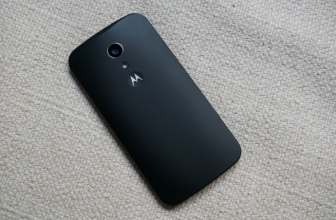
T-Mobile has finally started rolling out the latest Android 5.1 Lollipop update for Nexus 6 devices. This update comes with build number LMY47M, available for the Nexus 6 users in the US. Android 5.1 Lollipop build LMY47M brings the fixes related to cellular connectivity, Wi-Fi, bluetooth improvements as well as device protection and a number of software stability fixes.
This latest build LMY47E is currently available for the US users while it will take some time to rolled out globally for all the smartphones. But if the OTA update is not currently available in your region and can’t wait for the official OTA release in your area or those Nexus 6 users who are facing problems or not able to install this latest Android 5.1 Lollipop build due to modded firmware, then you can also install this firmware manually on the Nexus 6. Thanks to nxt (XDA Developers senior member), who has recently uploaded the firmware on XDA forums.
Remember that this is not a leaked firmware but stock Android 5.1 build LMY47M which is released by T-Mobile. The Nexus 6 should be running Android 5.0.1 LRX22C Lollipop stock firmware to get this update. In this guide first you’ll need to install a fresh Android 5.0.1 build, LRX22C and after that install the OTA update via ADB sideload using stock recovery.
So if you are interested to update T-Mobile Nexus 6 to Android 5.1 build LMY47M manually then we’ve a detailed guide to install this latest Android OS OTA update.
Note:
This guide containing the Android 5.1 Lollipop LMY47M OTA update working with the T-Mobile Nexus devices only. Do not try to install this firmware on any other device or incorrect variant, as a result your device might gets bricked. You should check the model number of your device first before going ahead to the installation guide.
Warning:
AndroidXDA.net will not be held responsible for any kind of damage or mishap occurred to your T-Mobile Nexus 6 during or after the installation of Android 5.1 OTA update manually. Proceed at your own risk.
Before Getting Started:
- It is highly recommended to take a proper backup of all your important data as well as settings before proceeding to the installation guide via any custom recovery like CWM or TWRP.
- Download and install the correct Nexus 6 USB Drivers on your PC.
- Enable USB Debugging Mode on the Nexus 6 by navigating to Settings > Developer Options.
- The battery level of the Nexus 6 should be at least upto 80% charged before going ahead to the ROM installation instructions.
- The booatloader of Nexus 6 should be unlocked.
Required Files:
- Download Android 5.1 Lollipop Build LMY47M OTA Update For Nexus 6
- Download Android 5.0.1 System Image (shamu-lrx22c-factory-ff173fc6.tgz)
- Fastboot and ADB Files from here.
Steps to Install Android 5.1 Lollipop OTA Update on T-Mobile Nexus 6:
Step No 1:- First of all, download all the required files from the above given links on the desktop of your PC.
Step No 2:- Now, create a new folder named n6ota51 on the PC.
Step No 3:- Unzip and move the adb & fastboot files to n6ota51 folder.
Step No 4:- Next, unzip the (shamu-lrx22c-factory-ff173fc6.tgz) file and move all its extracted files to n6ota51 folder.
Step No 5:- Connect your Nexus 6 to the PC using the USB data cable.
Step No 6: Turn OFF the device in order to boot into fastboot/ boot loader mode or recovery mode by pressing and holding Power and Volume Down buttons together or type the following command:
adb reboot bootloader
Step No 7:- Open the n6ota51 folder and within this folder Open command window. Now type and hit enter the following command to see the serial number written:
adb devices
Step No 8:- If the Nexus 6 drivers are properly installed on the PC then you’ll see the serial number. Then go ahead and type this command to reboot the device into bootloader mode in order to flash Android 5.0.1 on your Nexus 6:
fastboot reboot bootloader
Step No 9:- Give these commands to flash the Android 5.0.1 build LRX22C one by one:
fastboot flash boot boot.img
fastboot flash cache cache.img
fastboot flash recovery recovery.img
fastboot flash radio radio.img
fastboot flash system system.img
Step No 10:- Don’t close the command window and reboot to recovery by restarting the bootloader by entering this command:
fastboot reboot bootloader
Step No 11:- After booting the device into bootloader mode, you can use Volume keys to scroll to Recovery option, and then use Power key to select it to boot into Recovery Mode.
Step No 12:- Select the option, apply update from ADB using Volume keys.
Step No 13: Type this command and hit enter key to copy the OTA update file to your Nexus 6 and then installed automatically:
adb sideload 9504426dab3969b9b7da4e825ed91d4fc496cb25.signed-shamu-ota-LMY47M-from-LRX22C-fullradio.zip
Step No 14:- After the installation process is completed, select reboot system now to restart the device.
Done! You’ve successfully updated Nexus 6 to the latest Android 5.1 Lollipop build LMY47M with OTA firmware.
you’ll need adb > 1.0.32, which is not the correct adb provided. Source had information incorrect.